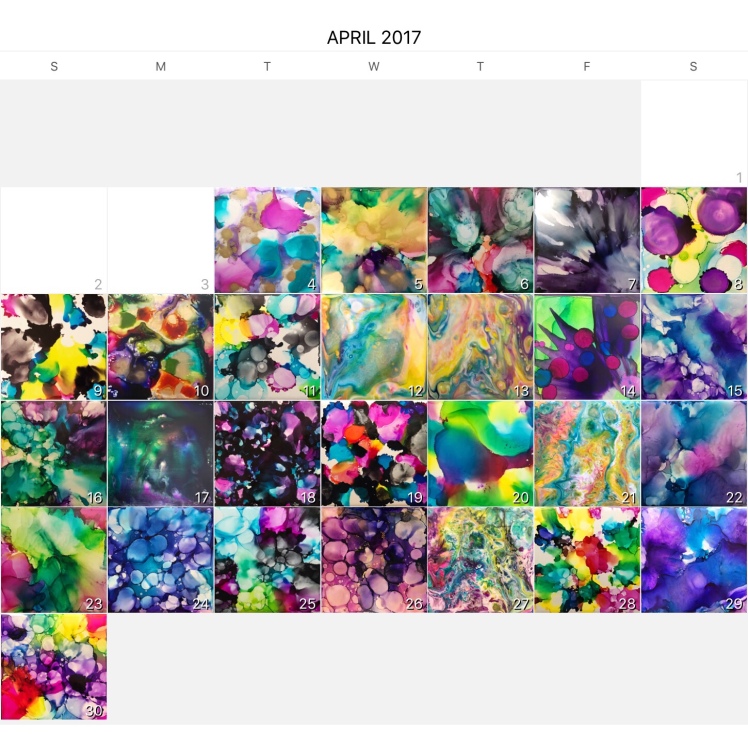
For my 100 day project this year, I chose to create #100DaysofFluidArt. In order to make this practical for my time (less than 30 minutes a day) and budget (I did not want to spend $400-$500 to make these paintings using cradled wood panels) I chose to use 6″x 6″ glazed ceramic tiles from the hardware store.

Glazed ceramic tiles are a great substrate for a few reasons: they are non-porous, which is fantastic for working with alcohol inks (something I had wanted to learn) and resin, they are easily obtainable, and they are cheap. Because they are non-porous, if I wanted to use them with acrylic paint I needed to prime them so that they paint wouldn’t peel off, but this was easily achieved with a layer of GAC 200 (from Golden) as a primer.
To start working with the tiles, I taped ALL of the backs of the 50 I bought before my project with blue painter’s tape. This allows me to paint & resin the tiles without worrying about the backs and I can peel the tape off once they have fully cured.


Then, I primed half of them with GAC 200 to use with acrylic pours and high flow acrylic paint. I left the others alone for use with alcohol inks & resin.


I resin all of my tiles after painting them to provide uv-protection & a glass-like finish. My favorite resin is Art Resin. Before resining, I now seal all paintings with gloss varnish. This prevents the reds & pinks disappearing upon resining.

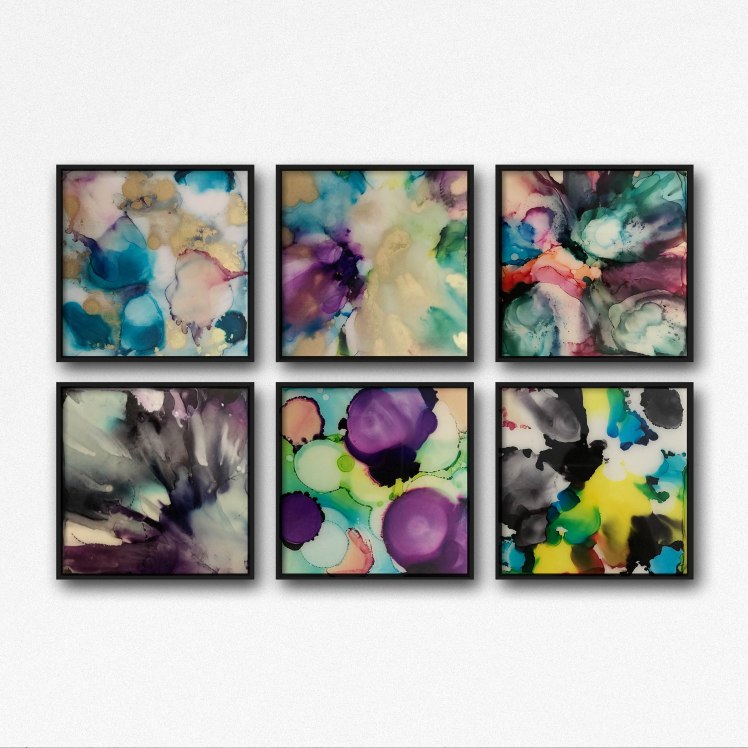
My biggest complaint using ceramic tiles is that collectors seem to think that they are coasters or for use tiling one’s kitchen (I guess they could be, but that’s an awfully expensive coaster or kitchen tile!). So, I have set out to frame them to make it clear that they are paintings.
I mocked up a tile painting (below) and then realized that I could ACTUALLY frame them this way.
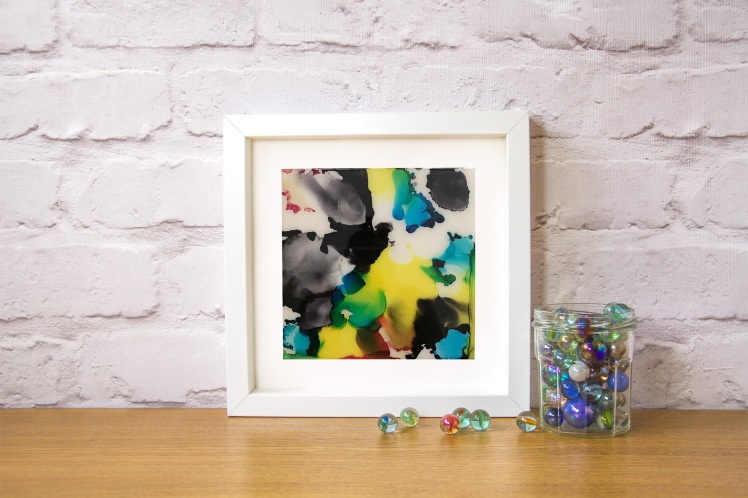
In order to frame them, I purchased 8″ x 8″ frames from Amazon and removed the glass, backing, and mat. The backing is mdf & I can adhere the tile to it with silicone adhesive for a very strong bond. Adhering the tile to the mat is just asking for the tile to fall as the matting surface pulls away. So, I layered the mat over the mdf backing board & put silicone adhesive within space of uncovered mdf, then I layered the tile over that and placed a heavy book on top. After a day, the tile was adhered to the backing board, with the mat sandwiched between the tile & backing board. Then I can pop it into the frame and hang it. This is a permanent mounting and not considered conservation grade.

If you have an interest in the fluid art techniques used on these tiles, I will be launching an e-course in August that covers alcohol inks, high flow acrylic paint, acrylic pours, and resin pours. Please visit my website to learn more & sign up for my mailing list to stay in the loop about the e-course.
**For links to products used please visit my supplies page on my website where I have affiliate links**


Absolutely stunning 😍 in love 💕💕
Thank you so much!!
You’re welcome 😊